bento icon close

Add a condition

Watch the video on this topic:

If you have a Premium subscription (or higher), you have the possibility to create conditional scenarios for your automatic workflows.

Note: If you have an Essential subscription, you will not be able to add behavioral conditions, but you will be able to create linear scenarios, without conditions. If you wish to have the "Behavioral conditions" option, please opt for a Premium or Exclusive subscription. Contact an advisor on +1 64 686 725 37.

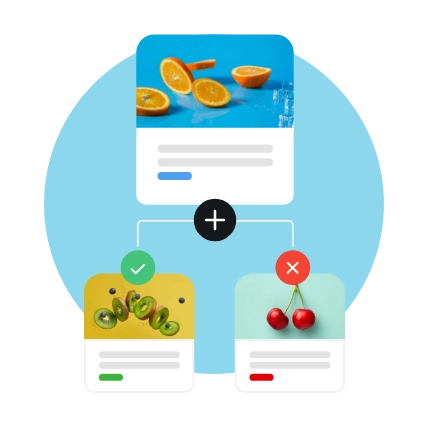
Adding a condition allows you to split your scenario into multiple branches.

  • Some of your recipients did

and some did not meet the predefined condition.

You create messages for each segment in order to adapt your communications according to the behavior of your recipients.

Adding a condition.


Adding a condition to an automatic workflow is always followed by a message, whether it is an email or SMS message.

The condition to be met will therefore only concern the message that it is linked to.

Once the condition has been defined (condition type + condition duration), the scenario splits into two branches: One branch for recipients who have fulfilled the condition, another for recipients who have not.

Each branch can be freely customized by adding new actions, such as sending emails or SMS messages or adding tthe contacts to a list.

Conditions for email messages

The conditions that can be configured on email messages are:

  • Opened: Use this condition if you want to make sure that your recipient has opened your email before sending them your next message or adding them to a list.
  • Clicked: Use this condition if you want to make sure that your recipient has clicked on your email before sending them your next message or adding them to a list. It is possible to specify on which link, which link selection, which link category, which link category selection the recipient will have to click to fulfill the condition.
  • Unsubscribed: This condition allows you to create a specific message to recipients who have unsubscribed from your mailing list (unsubscribe confirmation, for example) but you can also choose to add those contacts in a blacklist of your choice..
  • Bounced: This condition allows you to trigger a particular action for bounced contacts, such as changing communication channels for example (switch to SMS channel if the email does not exist) or adding them to a bounce list for example..

    The configuration of each of these conditions will result in the creation of a "Did meet the condition" branch: In this case, you will see a branch titled: "Did not open", "Did not click", "Did not unsubscribe", "Bounced".

    This will allow you, as well as for recipients who have fulfilled a condition, to continue your scenario with personalized actions (adding amessage or adding the contacts to a list) for those who have not met your conditions.

    Conditions for SMS messages.


    The conditions that can be set for SMS messages are as follows:
  • Received: Use this condition if you want to make sure that your recipient has received your SMS before sending them your next message. (Note: The SMS channel does not allow you to detect an opening of your message).
  • Clicked: Use this condition if you want to make sure that your recipient has clicked on your SMS before sending them your next message.
  • Replied: This option allows you to initiate an action for the recipients who have replied to your SMS (except for a "STOP" responses).
  • Unsubscribed: This condition allows you to create a specific message for recipients who have unsubscribed from your mailing list by replying "STOP" to your SMS (you can send them a confirmation of unsubscription, for example).
  • Bounced: This condition allows you to trigger a particular action for contacts appearing as bounces with their phone number, such as changing communication channels for example (switch to the email channel if the phone number cannot be reached).

    The setting of each of these conditions will result in the creation of a "Did not comply with the condition" branch: In this case, you will see any of the following a branch types: "Did not receive", "Did not click", "Did not respond", "Did not unsubscribe", "Did not bounce".

    This allows you to continue your scenario with a personalized message branch for those who have not fulfilled your conditions.

    Time limits for the fulfilment of the condition.


    The fulfilment of a condition is linked to a certain timeframe.

    This means that a condition can be met during a particular period. The time allowed for the condition to be fulfilled may be freely determined by you. You can set a duration from one minute to 99 days.

    During this time Mailify will continuously check if your recipient has fulfilled the defined conditions. If at the end of this period, the recipient has not fulfilled the previously set condition, then they will be considered as "Did not meet the condition" and will be returned to the corresponding branch of the workflow.

    It is important to note that, when you define a delay for the next message, it will be sent at the end of the defined delay period, and the countdown will start when the condition is considered as fulfilled or not fulfilled. Find out more about the delay of an action.